Whimsical Cotton Candy Cake
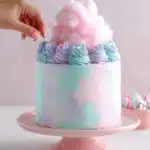
This whimsical Cotton Candy Cake features ultra-soft, pastel-tinted layers infused with irresistible cotton candy flavor, all enveloped in a dreamy cotton candy buttercream and finished with a cloud of real cotton candy on top. Perfect for celebrations or anyone who loves nostalgic, fun desserts, this cake is as delightful to eat as it is to behold.
- Prep Time: 45 minutes
- Cook Time: 35 minutes
- Total Time: 1 hour 20 minutes
- Yield: 15 slices
- Category: Desserts
- Method: Baking
- Cuisine: American
- Diet: Vegetarian
Ingredients
Cotton Candy Cake
- 2 1/2 cups (265g) sifted cake flour*
- 2 tsp baking powder
- 1/2 tsp baking soda
- 1/2 tsp salt
- 1 1/2 cups (300g) granulated sugar
- 1/2 cup (113g) unsalted butter, room temperature
- 4 large egg whites, room temperature
- 1/2 cup (120ml) vegetable oil
- 1 Tbsp Amoretti Natural Cotton Candy Artisan Flavor
- 1 1/4 cups (300ml) full-fat buttermilk**, room temperature
- 1 drop blue food coloring (optional)
- 1 drop pink food coloring (optional)
Cotton Candy Buttercream
- 2 cups (452g) unsalted butter, room temperature
- 7 cups (840g) powdered sugar
- 1 tsp Amoretti Natural Cotton Candy Artisan Flavor
- 4 Tbsp whole milk, room temperature
- 1/4 tsp salt
- 1 small drop blue food color gel
- 1 small drop purple food color gel
Topping
- 1 cup cotton candy
*DIY Cake Flour Recipe:
- For each cup of cake flour needed, measure 1 cup all-purpose flour, remove 2 Tbsp, and replace with 2 Tbsp cornstarch. Sift well.
**DIY Buttermilk Recipe:
- Add 1 Tbsp white vinegar to a measuring jar and top with 1 1/4 cups whole milk. Stir and let sit for 15 minutes.
Instructions
- Prepare the Cake Pans: Preheat your oven to 350°F/177°C. Spray three 6-inch or two 8-inch cake pans with baking spray and line the bottoms with parchment circles.
- Mix Dry Ingredients: In a medium bowl, whisk together cake flour, baking powder, baking soda, and salt. Set aside.
- Cream Butter and Sugar: In the bowl of a stand mixer fitted with the paddle attachment, beat the butter on high speed until creamy (about 2 minutes). Add granulated sugar and beat at medium-high for another 2 minutes, until light and fluffy, scraping down the bowl as needed.
- Add Egg Whites and Liquids: With the mixer on low, add egg whites one at a time until just combined. Scrape down as needed. Add the vegetable oil and Amoretti Natural Cotton Candy Artisan Flavor, increase speed to high, and beat for 1 minute.
- Combine Wet and Dry Ingredients: Turn mixer off, add all the dry ingredients. Mix on low until barely combined, then slowly pour in the buttermilk and continue mixing for about 30 seconds until the batter is smooth and a bit thin.
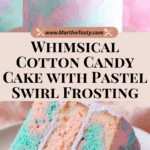
- Color the Batter: Divide the batter evenly into 2 bowls. Tint one bowl with 1 drop of pink food gel, whisk until color is uniform. Tint the other bowl with 1 small drop of blue food gel and whisk. (Note: Blue may turn slightly purple due to the pink base.)
- Layer Cake Batter: Using two separate 1/2 cup measures, alternate scooping pink and blue batter in random patterns into each prepared pan, until all batter is distributed.
- Bake: Bake cakes for 28 to 32 minutes, or until a toothpick inserted in the center comes out clean or with a few moist crumbs. Cool in pans for 5 minutes, then turn out onto a wire rack to cool completely.
- Make the Buttercream: With a stand mixer or hand mixer, cream butter on medium-high for about 7 minutes, until very pale and light. Gradually add powdered sugar on low, scraping after each addition. Add the milk and salt and mix on low until smooth and fluffy. Reserve 1 cup of buttercream for coloring later if desired. Add the Amoretti Natural Cotton Candy Artisan Flavor to the remaining buttercream and mix on low until pink and fully incorporated.
- Assemble the Cake: Once cakes are cool and level, add a swipe of buttercream on a cake board, lay the first layer, and top with 3/4 cup buttercream, smoothing to about 1/2 inch thick. Continue stacking, filling, and crumb coating with buttercream. Refrigerate for at least 30 minutes to firm up.
- Decorate (Watercolor Finish, Optional): Divide reserved white buttercream if using into two bowls. Tint one with purple, one with blue food gel. Use these and the pink buttercream to create a watercolor effect on the cake. Chill for 20 minutes.
- Pipe Decoration and Add Cotton Candy: Fill a piping bag with the remaining buttercream and pipe swirls around the top edge. Just before serving or displaying, top generously with cotton candy. (Note: Cotton candy topping should be added last, as it will droop after about an hour.)
Notes
- DIY Cake Flour: For every cup of flour, remove 2 Tbsp and add 2 Tbsp cornstarch. Sift well.
- DIY Buttermilk: Add 1 Tbsp white vinegar to a measuring jar and fill to 1 1/4 cups with whole milk. Stir and let sit 15 minutes.
- Cake layers can be made in advance and kept wrapped at room temperature for 2 days or frozen up to 2 months.
- Buttercream can be stored in the fridge in an airtight container for up to 2 weeks. Bring to room temperature and re-whip before using.
- Top with cotton candy only just before serving; it will deflate after an hour.
- Batter colors are essential for the pastel effect since most color will bake off during cooking.
Nutrition
- Serving Size: 1 slice (1/15 of the cake)
- Calories: 580
- Sugar: 64g
- Sodium: 190mg
- Fat: 27g
- Saturated Fat: 14g
- Unsaturated Fat: 12g
- Trans Fat: 0g
- Carbohydrates: 81g
- Fiber: 0.5g
- Protein: 3g
- Cholesterol: 50mg
Find it online: https://marthatasty.com/whimsical-cotton-candy-cake/

