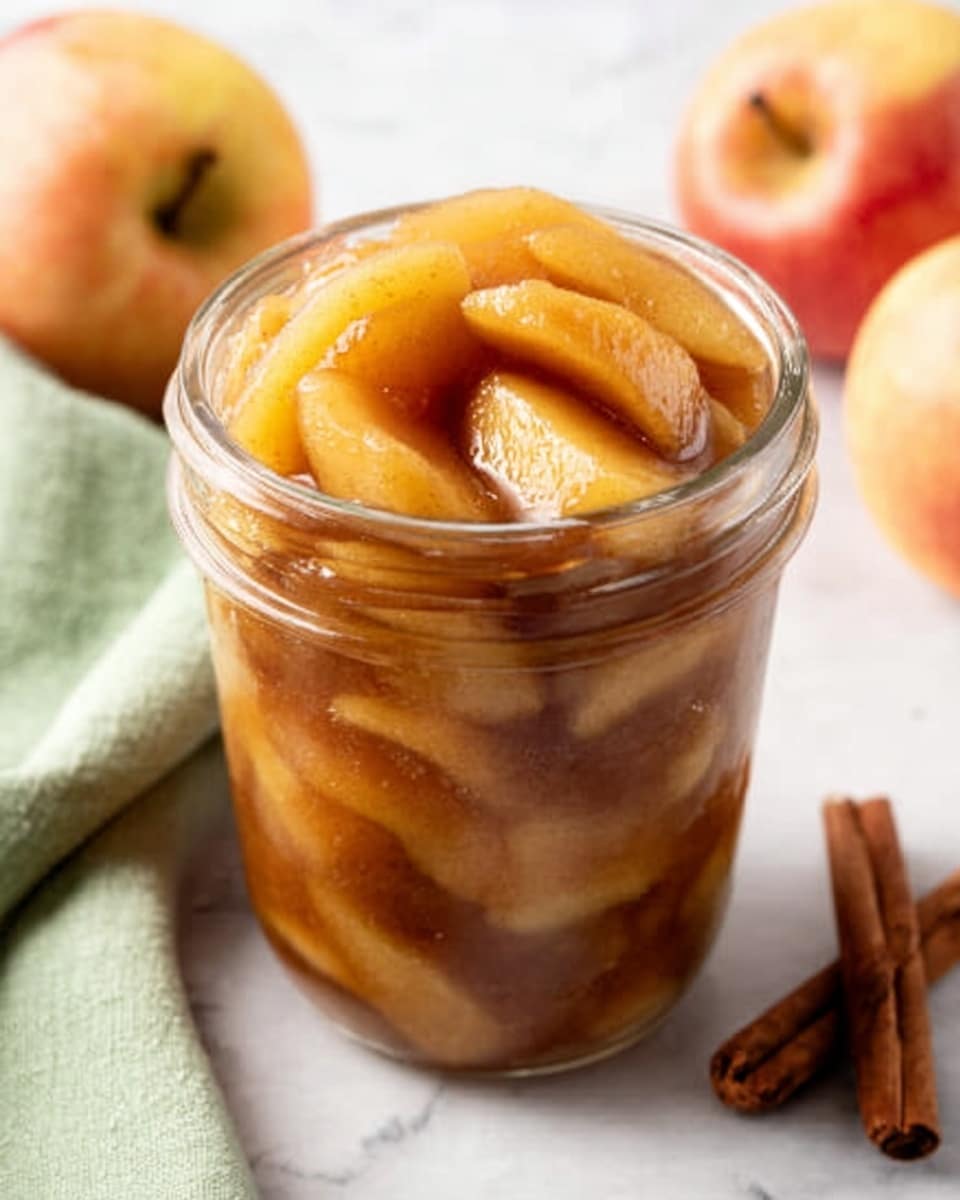
If you adore that soulful, comforting taste of tender apples infused with warm spices, this Homemade Apple Pie Filling Recipe is going to become your new best friend in the kitchen. Forget about those canned versions loaded with preservatives—this recipe captures the pure essence of fresh apples, cinnamon, and buttery goodness all cooked to perfection in just about 20 minutes. It’s not only incredibly easy but also versatile, making it perfect for pies, crisps, or simply enjoying by the spoonful. Trust me, once you try this homemade filling, you’ll wonder why you ever settled for anything less.
Ingredients You’ll Need
Getting the perfect pie filling is truly about choosing simple, wholesome ingredients that each play a crucial role in the flavor, texture, and even color of your dish. Every element here is essential, ensuring your filling is balanced, luscious, and bursting with that classic fall flavor.
- 8 medium apples peeled, cored, and sliced: The star of the show, providing sweetness and a tender bite that’s naturally delicious.
- ⅓ cup lemon juice: Helps the apples retain their bright flavor and prevents browning for that fresh look.
- ⅔ cup granulated sugar: Adds just the right amount of sweetness without overpowering the spices.
- ⅔ cup brown sugar: Brings a rich molasses note that deepens the overall flavor beautifully.
- ½ cup unsalted butter: Creates that silky mouthfeel and enhances the apple’s natural juices.
- 2 teaspoons ground cinnamon: The warm spice that gives the filling its unmistakable cozy aroma.
- 6 tablespoons cornstarch: Acts as the perfect thickening agent to achieve that ideal pie filling consistency.
- ½ cup water: Helps dissolve the cornstarch and brings everything together smoothly.
How to Make Homemade Apple Pie Filling Recipe
Step 1: Prepare and Toss the Apples
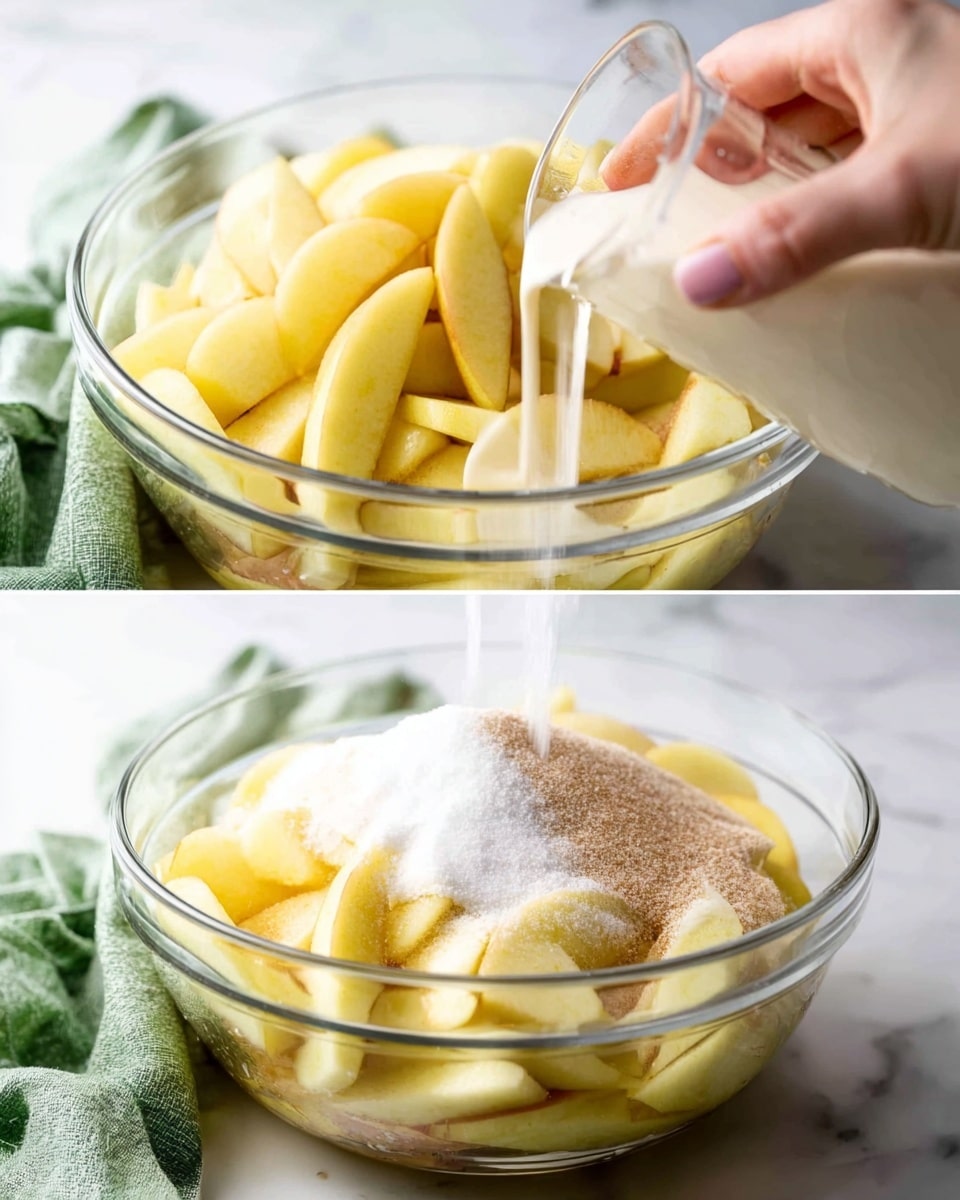
Start by peeling, coring, and slicing your apples—using fresh ones has a world of difference in texture compared to canned. Toss these slices in lemon juice right away to keep them vibrant and prevent browning while you prep the rest of your ingredients. This simple step also adds a subtle tang that balances the sweet juices beautifully.
Step 2: Mix in Sugars and Cinnamon
Add both the granulated and brown sugars along with the ground cinnamon directly to the apples. Give everything a good toss so that each apple slice gets evenly coated. The combination of sugars ensures the filling is sweet but with a hint of depth thanks to the brown sugar’s molasses richness; the cinnamon will infuse that classic warm spice aroma.
Step 3: Sauté the Apples in Butter
Melt the unsalted butter in a large skillet over medium-high heat, then add your apple mixture. Stir continuously until the sugars dissolve and the mixture starts to bubble gently. Cover the pan, reduce the heat to medium-low, and let the apples cook until they’re soft and releasing their juices, which usually takes about 7 minutes. This step is where the magic happens—where raw apples transform into a tender, flavorful filling.
Step 4: Thicken the Filling
Whisk the cornstarch together with water until smooth, then pour this slurry into the skillet with the apples. Continue stirring for 1 to 2 minutes as the filling thickens nicely. This ensures that your pie filling has that luscious, spoonable texture without being runny. Once thickened, remove from heat and let the mixture cool completely before use.
How to Serve Homemade Apple Pie Filling Recipe
Garnishes
To elevate your dish, sprinkle a little extra cinnamon or a light dusting of powdered sugar on top when serving. You can also add a small pat of butter or a dollop of freshly whipped cream to bring an indulgent creaminess that pairs magnificently with the spiced apples. Toasted nuts like pecans or walnuts add a lovely crunch, providing textural contrast that’ll make each bite even more delightful.
Side Dishes
This homemade apple pie filling shines spectacularly as a dessert on its own, but it also pairs wonderfully with vanilla ice cream or creamy mascarpone cheese. For a heartier twist, serve it alongside flaky puff pastry or a simple vanilla cake to soak up all those fragrant juices. It’s also fabulous stirred into plain yogurt or oatmeal for a luxurious breakfast treat.
Creative Ways to Present
Beyond classic pies, try using this filling as a topping for pancakes, waffles, or French toast to instantly amp up your brunch game. You can also spoon it over a grilled pork chop or roasted chicken breast for a surprisingly delicious sweet-savory combo. If you’re feeling adventurous, swirl it into baked cheesecake or layer it in parfaits for an eye-catching dessert that tastes like fall on a spoon.
Make Ahead and Storage
Storing Leftovers
One of the best perks of this Homemade Apple Pie Filling Recipe is how well it holds up. Store any leftovers in an airtight container in the refrigerator, where it will keep fresh for up to two days. This makes it a fantastic option for prepping ahead, reducing kitchen stress on busy days.
Freezing
If you want to stash some filling for longer, freezing works really well. Just cool the filling completely, transfer to a freezer-safe container, and it should last for about 2-3 months. When you’re ready to indulge, thaw it overnight in the fridge and give it a good stir before using.
Reheating
To bring your cooled or frozen filling back to life, gently warm it over low heat on the stovetop while stirring occasionally until heated through. This method keeps the texture silky and prevents the apples from turning mushy. You can also reheat in the microwave in short bursts, stirring between each interval for best results.
FAQs
Can I use different types of apples for this recipe?
Absolutely! A mix of sweet and tart apples like Fuji, Gala, and Granny Smith can add complexity to your filling. Just keep in mind firmer apples hold their shape better during cooking.
Is it necessary to peel the apples?
For the smoothest texture and classic pie filling look, peeling is recommended, but you can leave the skins on if you prefer more fiber and a bit of rustic charm in your filling.
Can I make this filling vegan?
Yes, simply swap the butter for a plant-based alternative like coconut oil or vegan margarine, and you’re good to go without sacrificing any of the delicious flavor.
How long can I store the filling before using it in a pie?
This filling can be safely stored in the fridge for up to two days before baking, making it a great option for meal prep or busy weeks.
Can I use this filling for other desserts besides apple pie?
Definitely! This homemade filling works beautifully in crisps, turnovers, tarts, or even as a topping on ice cream and pancakes for a sweet, spiced treat.
Final Thoughts
Making your own Homemade Apple Pie Filling Recipe is such a rewarding experience that elevates any dessert instantly. It’s quick, easy, and relies on simple ingredients that come together to create something truly special. I can’t wait for you to try it and discover just how satisfying and versatile fresh apple pie filling can be. Happy baking!
PrintHomemade Apple Pie Filling Recipe
This homemade apple pie filling recipe features tender, perfectly spiced apples cooked to a luscious consistency, making it an ideal replacement for canned fillings. With warm cinnamon and a balance of brown and granulated sugars, this filling is simple to prepare and perfect for desserts like pies or tarts.
- Prep Time: 10 minutes
- Cook Time: 10 minutes
- Total Time: 20 minutes
- Yield: 6 cups
- Category: Dessert
- Method: Stovetop
- Cuisine: American
Ingredients
Fruits
- 8 medium apples, peeled, cored, and sliced (3 pounds, 1.35 kg)
- ⅓ cup lemon juice (80 mL)
Sweeteners and Spices
- ⅔ cup granulated sugar (133 g)
- ⅔ cup brown sugar, light or dark (140 g)
- 2 teaspoons ground cinnamon
Other Ingredients
- ½ cup unsalted butter (113 g)
- 6 tablespoons cornstarch
- ½ cup water (120 mL)
Instructions
- Prepare Apples: In a large mixing bowl, toss the peeled, cored, and sliced apples with lemon juice to prevent browning and add a slight tartness.
- Mix Sugar and Spices: Add granulated sugar, brown sugar, and ground cinnamon to the apples. Toss thoroughly to coat the apple slices evenly with the sweet spices.
- Cook Apples: Melt unsalted butter in a large skillet over medium-high heat. Add the apple mixture and cook, stirring frequently, until the sugars dissolve and the mixture begins to simmer, approximately 2 minutes. Cover the skillet, reduce heat to medium-low, and continue to cook until the apples soften and release most of their juices, about 7 minutes.
- Thicken Filling: In a medium bowl, whisk cornstarch with water until smooth. Pour this slurry into the skillet and cook, stirring frequently, for 1 to 2 minutes until the mixture thickens.
- Cool and Store: Remove the skillet from heat and allow the apple pie filling to cool completely. Store in an airtight container in the refrigerator for up to 2 days before use.
Notes
- Allow the apple pie filling to cool completely before using to ensure it sets properly.
- This filling can be made a day ahead to reduce preparation time when baking your pie.
- Using fresh apples and making your own filling results in a more flavorful and natural taste compared to canned alternatives.

