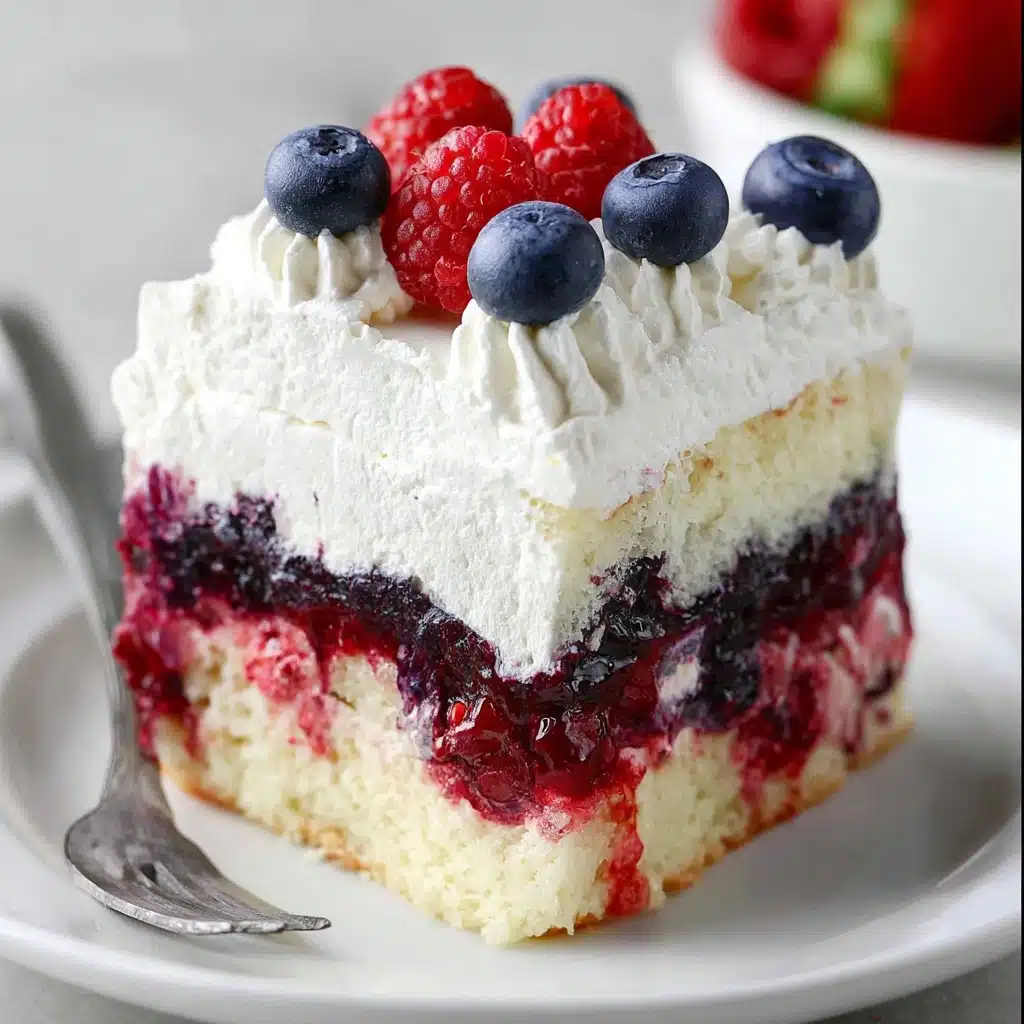
Summer Berry Poke Cake is the ultimate festive treat that brings together vibrant berries, tangy cheesecake filling, and fluffy whipped cream, all nestled into a soft white cake base. The poke cake technique lets luscious red and blue homemade berry sauces seep into every bite, creating a marbled masterpiece of color and flavor. Ideal for Independence Day, backyard barbecues, or any summer potluck, this dessert’s red, white, and blue layers always steal the show and win hearts. Prepare for friends and family to swoon each time you serve this Summer Berry Poke Cake!
Ingredients You’ll Need
Every element in this recipe has a delicious purpose, layering textures and colors for that iconic Summer Berry Poke Cake effect. The secret is simple ingredients combined in smart ways – no fancy techniques required, just thoughtful steps for maximum wow-factor!
- White cake mix: The vanilla canvas that soaks up fruity flavors and keeps things easy for any skill level.
- Ingredients for cake mix: Usually eggs, oil, and water – check your box for exact measurements, and don’t substitute for best texture.
- Strawberries (1 1/2 cups, diced): Offer that classic summer sweetness and a pop of color in the red sauce.
- Raspberries (1 1/2 cups): Lend a tangy depth and boost the red hue, balancing the sweetness of strawberries.
- Sugar (for sauces): Enhances each berry’s natural flavor, helping sauces thicken with the gelatin.
- Lemon juice: Brightens the sauces and keeps flavors lively, counteracting any heaviness from the cake.
- Water: Just enough to get the sauces juuuust right for pouring.
- Gelatin powder (2 tsp for each sauce): Adds body to the berry sauces so they breeze through the cake’s holes and set beautifully.
- Blueberries (2 1/2 cups): Provide bold blue streaks and their signature tang in the second sauce.
- Cream cheese (8 oz, room temperature): The base for your dreamy, tangy cheesecake layer.
- Heavy whipping cream (2 cups): Get ready for whipped magic – both for folding into the cheesecake and making billowy swirls.
- Vanilla extract (2 tsp): Builds a rich, classic flavor across the creamy layers.
- Powdered sugar (1 cup): Sweetens up both the cream cheese and whipped cream, preventing that “powdery” taste.
- Fresh berries (for garnish): A final burst of color and freshness, bringing the whole Summery vision together on top.
How to Make Summer Berry Poke Cake
Step 1: Bake the Cake
Start by preparing the white cake mix exactly as directed on its box, which ensures a foolproof, fluffy base. Pour the batter into a 9 x 13-inch dish. Once baked, remove from the oven and, while it’s still warm, use the handle of a wooden spoon to poke holes about 1 inch apart all over the cake – this is where all that irresistible berry magic is going to go! Then, let the cake cool completely on the counter while you whip up the sauces.
Step 2: Bloom the Gelatin
In two small bowls, sprinkle 2 teaspoons of gelatin over 2 tablespoons of water each. Let them sit and bloom – this just means allowing the gelatin to absorb water and expand, so your berry sauces set perfectly instead of running right through the cake.
Step 3: Make Red Berry Sauce
Toss 1 cup strawberries and 1 cup raspberries with 1/2 cup sugar, 1 tablespoon lemon juice, and 1 tablespoon water into a medium saucepan. Simmer over medium heat, stirring and mashing occasionally until everything gets soft and juicy (about 5-8 minutes). Mash the mixture well with a potato masher for maximum color and flavor. Remove from heat, stir in the bloomed gelatin until fully dissolved, then fold in the remaining diced strawberries and raspberries. Set aside to cool – you want a pourable, slightly thick texture.
Step 4: Make Blueberry Sauce
Repeat the process for the blue! In a clean medium saucepan, combine 1 1/2 cups blueberries, 1/2 cup sugar, 1 tablespoon lemon juice, and 1 tablespoon water. Simmer, mash, then stir in bloomed gelatin, followed by the rest of the blueberries. Cool until thickened but pourable, just like with the red sauce.
Step 5: Fill the Cake with Berry Sauces
Using a spoon, alternate pouring cooled red and blue sauces into the poked holes of the cake. The goal: colorful, patriotic streaks in every slice. Spread any remaining sauce smoothly over the top. Place the cake in the fridge for at least 30 minutes, letting those vibrantly hued sauces set and marry with the cake.
Step 6: Prepare the Cheesecake Filling
Grab a large bowl and beat the room-temperature cream cheese with 1/2 cup powdered sugar until smooth and creamy. In separate bowl, whip 2 cups heavy cream with vanilla and the other 1/2 cup powdered sugar until firm peaks form – you’re aiming for about 4 cups whipped cream total. Fold half the whipped cream into the cream cheese mixture gently until fully blended; this keeps the filling super light and spreadable.
Step 7: Top and Decorate the Cake
Evenly spread the cheesecake filling over the chilled, sauce-filled cake. To finish, use the remaining whipped cream either piped as fancy swirls with a star tip or swooped across the top for classic comfort. For the true Summer Berry Poke Cake flourish, crown everything with a generous scatter of fresh berries just before serving.
How to Serve Summer Berry Poke Cake
Garnishes
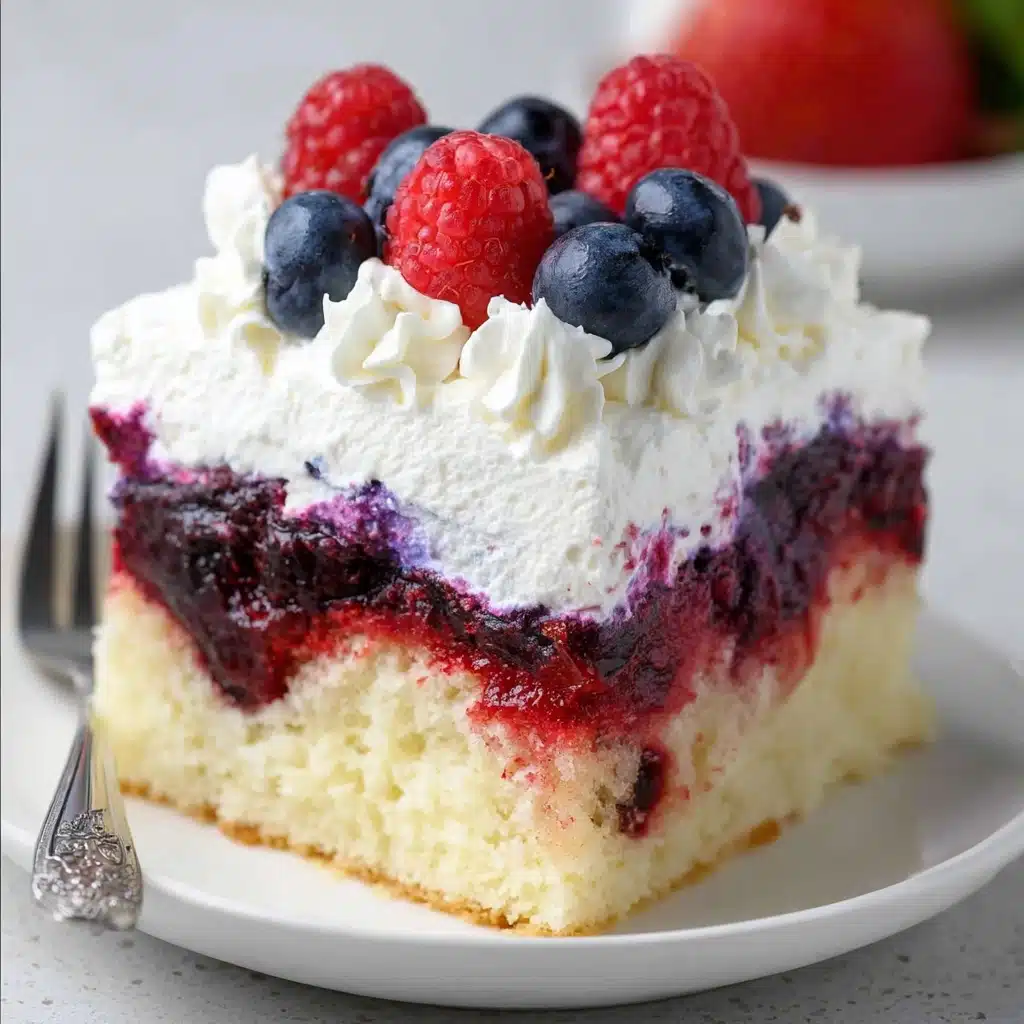
Don’t hold back on the garnishes! Pile fresh strawberries, whole raspberries, and blueberries artfully over the whipped cream. If you’re feeling extra festive, try a dusting of powdered sugar or a sprinkle of patriotic sprinkles for an extra-celebratory finish.
Side Dishes
This luscious cake is a showstopper on its own, but if you’re entertaining, pair it with light options like a refreshing lemonade, iced tea, or a fruit salad. A scoop of vanilla ice cream or lemon sorbet makes each slice a decadent treat, especially on extra-warm summer days.
Creative Ways to Present
For picnics or grab-and-go fun, slice the Summer Berry Poke Cake into squares and serve in cupcake liners. Or, layer cubes of prepared cake, cheesecake filling, and extra berries in clear cups for adorable trifles. You can even make patriotic flag patterns with the berries to wow your guests even more!
Make Ahead and Storage
Storing Leftovers
Cover the cake tightly with plastic wrap or transfer slices to an airtight container. Store in the fridge for up to three days; it gets even more delicious as the berry and cream layers meld together and the cake stays irresistibly moist.
Freezing
While poke cakes freeze surprisingly well, it’s best to freeze before adding the fresh berry garnishes and whipped cream. Wrap the sauce-filled, fully cooled cake base tightly in several layers of plastic wrap and foil. When ready to serve, thaw overnight in the fridge, then add the whipped topping and garnishes fresh for best flavor and texture.
Reheating
No reheating needed for this dreamy dessert! Serve chilled straight from the fridge, or let it sit at room temperature for a few minutes to slightly soften the cream and berries for the best melt-in-your-mouth experience.
FAQs
Can I use frozen berries instead of fresh?
Absolutely! Frozen berries work great for the sauces in Summer Berry Poke Cake. Just thaw them before using, and keep in mind you might need to simmer a few extra minutes to evaporate some additional liquid.
What if my berry sauces get too thick?
If your sauces set up too firmly while cooling, simply reheat them gently over low heat, stirring constantly, until they return to a pourable (but not watery) consistency before adding to the cake.
Can I make Summer Berry Poke Cake in advance?
Yes! This cake actually improves with chill time. Assemble it (except garnishes) up to a day ahead, then top with fresh berries just before serving for the brightest color and texture.
Is there a gluten-free option?
Just substitute your favorite gluten-free white cake mix and check that your other ingredients (especially the gelatin and baking powders) are gluten-free. The rest of the recipe works the same!
Can I use Cool Whip instead of homemade whipped cream?
You sure can. While homemade whipped cream gives a fresher flavor and fluffier texture, Cool Whip makes an extra-easy shortcut that holds up well if you need to transport your Summer Berry Poke Cake to a party.
Final Thoughts
If you’re after a dessert that’s bursting with color, flavor, and all the best parts of summer, you simply have to try Summer Berry Poke Cake. It’s a guaranteed hit at every gathering, and once you see those patriotic streaks and creamy topping, you’ll want to share it with everyone you know!
PrintSummer Berry Poke Cake Recipe
Summer Berry Poke Cake is a vibrant, patriotic dessert combining fluffy white cake with pockets of homemade strawberry-raspberry and blueberry sauces, a luscious cheesecake filling, and a light whipped cream topping. Fresh berries finish this cool no-bake treat, making it perfect for summer picnics, July 4th parties, or any gathering where you want a show-stopping, fruity dessert.
- Prep Time: 1 hour
- Cook Time: 30 minutes
- Total Time: 1 hour 30 minutes
- Yield: 12–15 servings
- Category: Desserts
- Method: No-cook
- Cuisine: American
- Diet: Vegetarian
Ingredients
Cake
- 1 box white cake mix
- Ingredients listed on the box (typically eggs, oil, water)
Strawberry and Raspberry Sauce
- 1 1/2 cups diced strawberries
- 1 1/2 cups raspberries
- 1/2 cup sugar
- 1 tablespoon lemon juice
- 1 tablespoon water
- 2 teaspoons gelatin powder dissolved in 2 tablespoons water
Blueberry Sauce
- 2 1/2 cups blueberries
- 1/2 cup sugar
- 1 tablespoon water
- 1 tablespoon lemon juice
- 2 teaspoons gelatin powder dissolved in 2 tablespoons water
Cheesecake Filling and Topping
- 8 oz cream cheese, room temperature
- 2 cups heavy whipping cream
- 2 teaspoons vanilla extract
- 1 cup powdered sugar, divided
- Fresh berries for garnish
Instructions
- Prepare the cake – Mix and bake the white cake according to package directions in a 9×13-inch dish. Once baked, remove from the oven and, using the handle of a wooden spoon, poke holes about 1 inch apart throughout the cake. Set aside to cool completely.
- Dissolve the gelatin – In two small bowls, dissolve 2 teaspoons gelatin in 2 tablespoons water for each sauce and let bloom while you prepare the berries.
- Make the strawberry-raspberry sauce (Red Sauce) – In a medium saucepan, combine about 1 cup of strawberries, 1 cup of raspberries, 1/2 cup sugar, 1 tablespoon lemon juice, and 1 tablespoon water. Simmer over medium heat, stirring frequently, until fruit softens (about 5-8 minutes). Mash with a potato masher, then add the dissolved gelatin and the remaining diced strawberries and raspberries. Stir well over medium heat until the gelatin dissolves. Set aside to cool and thicken slightly.
- Make the blueberry sauce (Blue Sauce) – In another saucepan, combine about 1 1/2 cups blueberries, 1/2 cup sugar, 1 tablespoon lemon juice, and 1 tablespoon water. Simmer until berries have softened, stirring frequently. Mash the blueberries, then add the dissolved gelatin and remaining blueberries. Continue stirring until the gelatin is fully melted. Allow sauce to cool until thickened but still pourable.
- Fill the cake holes with berry sauces – Once both sauces are cooled to a pourable but thick consistency, alternate spooning the red and blue sauces into the holes in the cake. Use the back of the spoon to help fill the holes thoroughly, spreading any leftover sauce across the top of the cake. Refrigerate the cake to set the sauces completely.
- Make the cheesecake filling – In a large bowl, beat softened cream cheese and 1/2 cup powdered sugar together until smooth. Set aside.
- Make the whipped cream – In another large bowl, beat heavy whipping cream, vanilla extract, and remaining 1/2 cup powdered sugar together until stiff peaks form, yielding about 4 cups of whipped cream. Divide the whipped cream in half.
- Assemble and top the cake – Gently fold half of the whipped cream into the cream cheese mixture to create a cheesecake filling layer, mixing until well incorporated. Spread this evenly over the chilled cake. Transfer the other half of the whipped cream to a piping bag fitted with a star tip and pipe swirls on top of the cake, or simply spread evenly with a spoon.
- Chill and garnish – Refrigerate the cake until ready to serve. Just before serving, garnish with fresh berries. Slice, serve, and enjoy!
Notes
- Sauces should be thick but pourable before adding to the cake, similar to unset pudding. If too runny after cooling to room temperature, refrigerate briefly, stirring occasionally to monitor texture.
- If sauces set too thick, simply reheat gently until they’re once again pourable but not watery.
- For distinct red, white, and blue sections, take care when spooning sauces into the cake holes and avoid over-mixing on the surface for best visual effect.
- Keep the cake refrigerated until ready to serve for the best texture and stability.
- This cake is best enjoyed within 2–3 days, as the berry sauces and cream keep it moist.
Nutrition
- Serving Size: 1 slice (1/15th of cake)
- Calories: 325
- Sugar: 32g
- Sodium: 290mg
- Fat: 15g
- Saturated Fat: 8g
- Unsaturated Fat: 6g
- Trans Fat: 0g
- Carbohydrates: 42g
- Fiber: 2g
- Protein: 4g
- Cholesterol: 50mg

