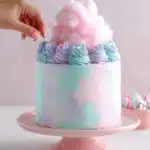
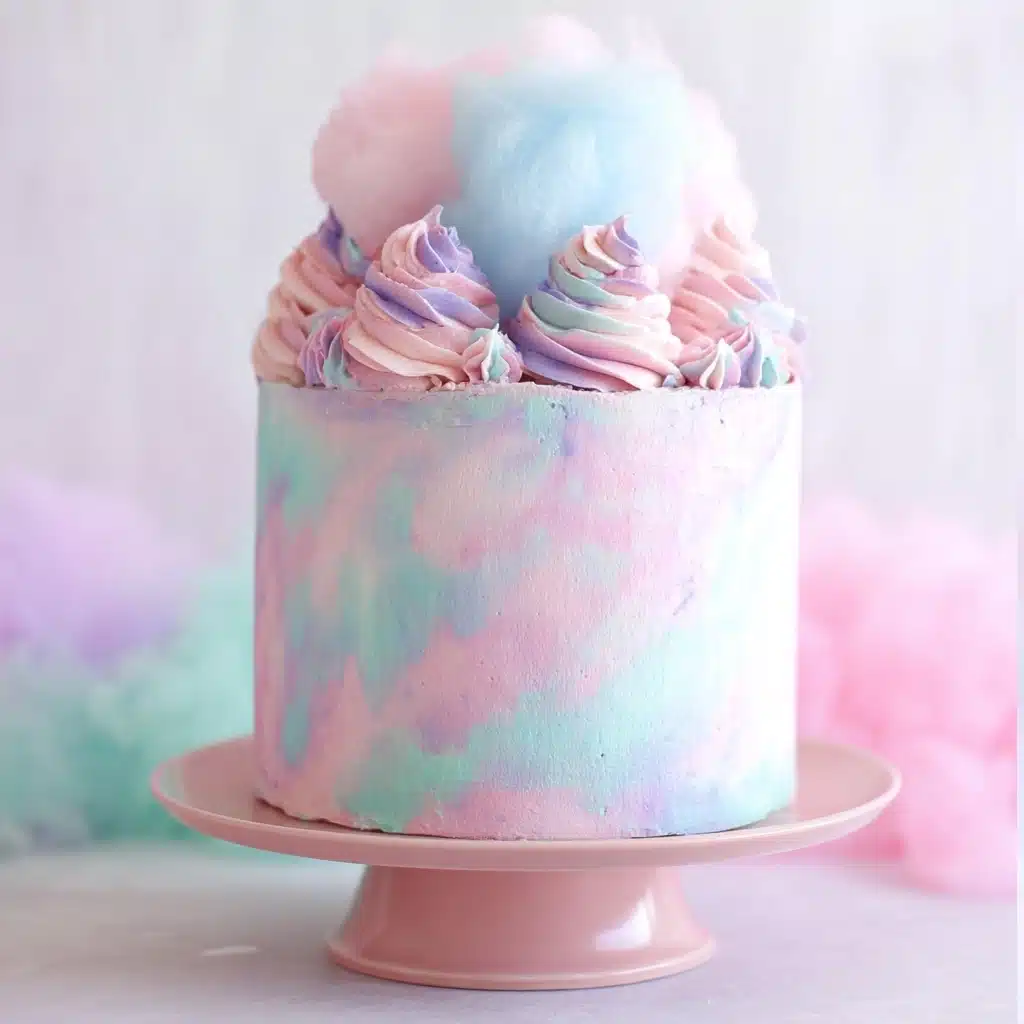
Dive into a world of whimsy and nostalgia with this showstopping cotton candy cake! This dreamy dessert combines moist pastel layers with billowing clouds of cotton candy buttercream, topped off by a true carnival flourish. If you can’t find cake flour locally, here’s how to make a homemade version using all purpose flour and cornstarch, so there’s no need to put your cake dreams on hold. With a tender crumb, a melt-in-your-mouth sweetness, and a beautiful, watercolor-frosted finish, it’s an instant centerpiece for birthdays, showers, or any occasion that calls for a touch of magic.
Ingredients You’ll Need
Let’s talk about the magic behind the scenes: a surprisingly simple lineup of ingredients, each one chosen for maximum flavor and that unmistakable cotton candy texture. From pastel food gels to secret DIY shortcuts, every element creates the moistest, most cloud-like crumb and the most ethereal frosting imaginable.
- Cake Flour: The key to a tender, fluffy crumb—if you can’t find cake flour locally, here’s how to make a homemade version using all purpose flour and cornstarch (see notes below).
- Baking Powder & Baking Soda: These provide just the right lift, making each layer pillowy and light.
- Salt: Just a pinch enhances the sweetness and balances the flavors perfectly.
- Granulated Sugar: Adds classic sweetness and helps create a delicately soft cake.
- Unsalted Butter: Brings rich flavor and essential moisture to both the cake and the buttercream.
- Egg Whites: Keep the crumb light, giving your cake a soft, snowy texture.
- Vegetable Oil: Adds extra tenderness and ensures your cake stays moist for days.
- Amoretti Natural Cotton Candy Artisan Flavor: The secret to grown-up cotton candy flavor, no sticky fingers required!
- Full-Fat Buttermilk: For richness and a subtle tang—it also guarantees an ultra-soft cake. (See notes for a DIY version!)
- Blue & Pink Food Coloring: Turn each slice into a pastel masterpiece.
- Powdered Sugar: The heart of the buttercream, creating that signature silky finish.
- Whole Milk: Helps keep the buttercream spreadable and smooth.
- Purple Food Color Gel: Adds an extra pop of dreamy color to your watercolor frosting.
- Cotton Candy: The final flourish for an absolutely magical presentation.
How to Make if you can’t find cake flour locally, here’s how to make a homemade version using all purpose flour and cornstarch
Step 1: Prep and Preheat
Preheat your oven to 350°F (177°C) and prep three 6-inch or two 8-inch cake pans. To avoid any sticking, lightly spray the sides with baking spray and line the bottoms with parchment rounds. This step sets you up for perfectly smooth cake releases later.
Step 2: Mix the Dry Ingredients
Whisk together the cake flour (or, if you can’t find cake flour locally, here’s how to make a homemade version using all purpose flour and cornstarch: for each cup of cake flour, measure 1 cup all purpose flour, remove 2 tablespoons, and add 2 tablespoons cornstarch), baking powder, baking soda, and salt in a medium bowl. This combines everything evenly, ensuring each bite will be soft and airy.
Step 3: Cream Butter and Sugar
In the bowl of your stand mixer with the paddle attachment, beat butter until creamy (about 2 minutes). Add sugar and blend until the mixture is fluffy and light, scraping the bowl at least once. This crucial step whips air into the base for a soft cake crumb.
Step 4: Incorporate Egg Whites, Oil, and Flavor
With the mixer on low, gently add the egg whites, one at a time, making sure each is combined before adding the next. Mix in the vegetable oil and the magic: Amoretti Natural Cotton Candy Artisan Flavor. Turn the mixer up and beat for one minute until you have a smooth, almost mousse-like batter.
Step 5: Finish the Batter and Divide Colors
Turn off the mixer and add all dry ingredients at once, then mix on low until just combined. Gradually pour in the buttermilk (remember, if you need a substitute, DIY it with milk and vinegar as noted). Mix only until your batter looks uniform and slightly thin. To get that pastel marble, split the batter between two bowls: tint one with pink and the other blue food gel. The pink might fade as it bakes, but don’t skip it—it’s part of the magic!
Step 6: Layer and Bake
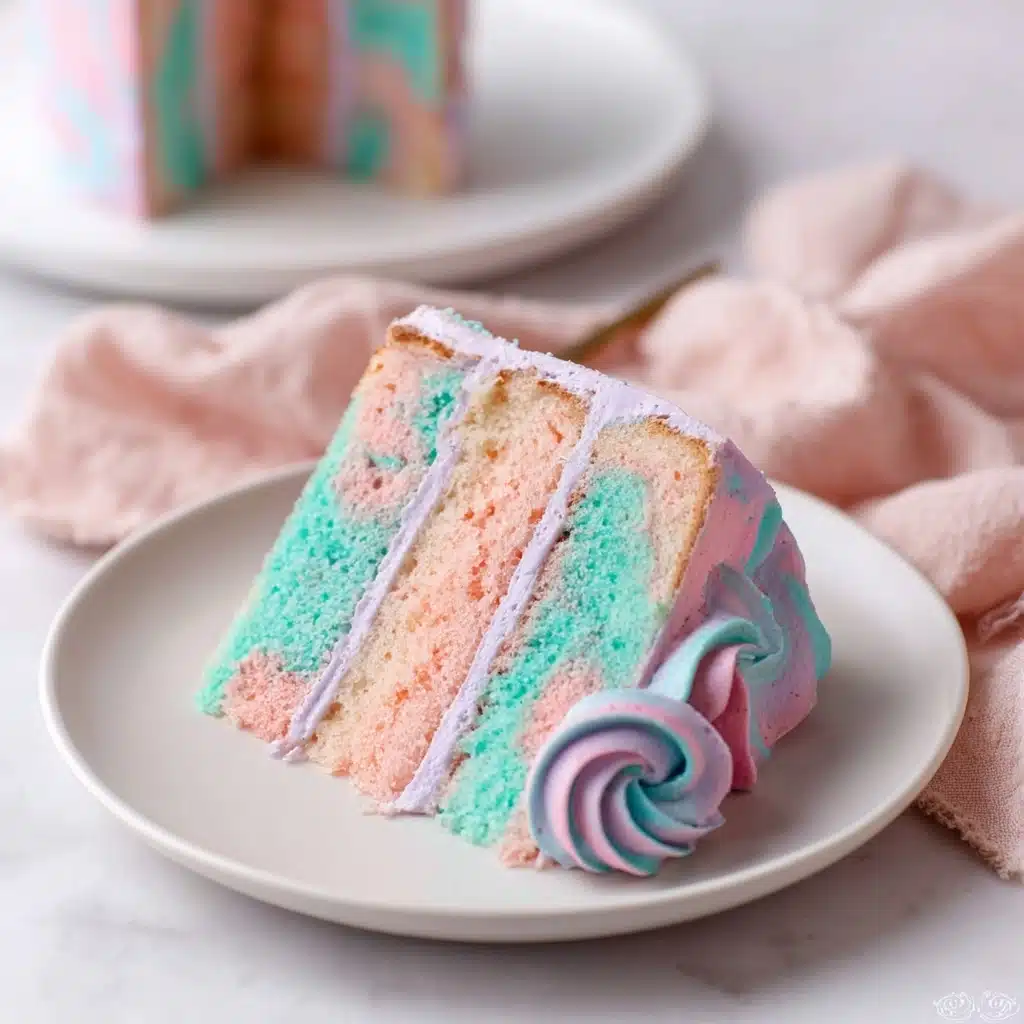
Using separate scoops for each color, alternate spooning batter into your prepared pans in a random, swirling pattern. Bake for 28–32 minutes. The cakes are ready when a toothpick comes out with just a few crumbs and the tops spring back under your touch. Let layers cool 5 minutes in the pan before transferring to a wire rack.
Step 7: Make the Cotton Candy Buttercream
While cakes cool, make your buttercream. Beat butter on medium-high until nearly white and ultra-creamy (about 7 minutes). Turn the mixer to low and add powdered sugar, a bit at a time. Add milk and salt, mixing until smooth. If you’d like pretty watercolor frosting, reserve one cup of white buttercream before mixing the cotton candy flavor into the rest (it’ll tint the main batch pink). Tint the reserved portion blue and purple as desired.
Step 8: Assemble and Decorate
Once cakes are completely cool and leveled, start stacking! Place a cake round on a cardboard base, then add a thick layer of buttercream. Repeat for all layers, then crumb coat the outside with a thin buttercream layer. Chill 30 minutes, then use colored buttercreams to create a watercolor finish. Chill again, pipe decorative swirls on top, and, just before serving or displaying, crown your masterpiece with a tuft of fluffy cotton candy for that true carnival magic.
How to Serve if you can’t find cake flour locally, here’s how to make a homemade version using all purpose flour and cornstarch
Garnishes
Nothing says “party!” quite like an over-the-top cotton candy flourish. Pile the softest cotton candy high on top of the cake just before serving. If you plan ahead, consider using pastel sprinkles or edible glitter for extra sparkle. Creamy swirls of buttercream, piped with a star tip, add both height and drama, making every slice feel like a celebration.
Side Dishes
With something this sweet and showstopping, keep it simple—fresh berries, a bubbly punch, or a scoop of fruity sherbet make delightful partners. For a special brunch or birthday spread, offer an array of fruity teas and lemonade. Anything light and bright will balance the fun sugar rush.
Creative Ways to Present
Try slicing the cake into thin, tall layers for an impressive pastel reveal. Serve individual slices on colorful plates, or cut the cake into tiny squares for an adorable dessert table display. You can even make mini versions in mason jars, stacking cubes of cake with swirls of buttercream—the ultimate grab-and-go treat, especially if you can’t find cake flour locally, here’s how to make a homemade version using all purpose flour and cornstarch for smaller batch baking.
Make Ahead and Storage
Storing Leftovers
Wrap leftover cake slices tightly in plastic wrap and store at room temperature for up to two days. If you want to keep the cake extra fresh, especially in warm weather, tuck it into an airtight container in the fridge—just let it come to room temperature before serving for the best texture.
Freezing
You can freeze unfrosted cotton candy cake layers after wrapping them in two layers of plastic wrap and a layer of foil; they’ll keep beautifully for up to two months. Thaw them in the fridge overnight, then bring to room temperature before assembling. Buttercream freezes well, too: transfer it to an airtight container and freeze for up to two weeks—simply thaw and re-whip before using.
Reheating
No need to reheat, but if your buttercream has firmed up in the fridge, let slices sit at room temperature for about an hour. For maximum fluff, re-whip leftover buttercream before spreading. Remember, add the cotton candy topping just before eating—for the freshest effect, because it tends to shrink after an hour.
FAQs
Can I make this cake without the cotton candy flavoring?
The unique flavor really comes from the Amoretti Natural Cotton Candy Artisan Flavor, but if you can’t find cake flour locally, here’s how to make a homemade version using all purpose flour and cornstarch, and you can swap the cotton candy flavor with a different extract (like vanilla or almond). Just note that you’ll lose some of that classic carnival taste!
Do I have to use the food coloring?
No, it’s optional! The food coloring creates the whimsical pastel look, but the cake will taste just as dreamy without it. If you can’t find cake flour locally, here’s how to make a homemade version using all purpose flour and cornstarch—you can keep the rest of the process exactly the same, color or no color.
How far ahead can I make the buttercream?
Buttercream can be made up to two weeks in advance. Store it in an airtight container in the fridge, then bring it back to room temperature and re-whip before using. This tip is especially handy if you can’t find cake flour locally, here’s how to make a homemade version using all purpose flour and cornstarch and want to prep everything else ahead!
Can I substitute regular milk for the buttermilk?
Buttermilk adds extra tenderness and tang, but a quick DIY works in a pinch: add 1 tablespoon white vinegar to 1 1/4 cups whole milk, stir, and let sit for 15 minutes. For even better texture, remember that if you can’t find cake flour locally, here’s how to make a homemade version using all purpose flour and cornstarch instead of skipping it!
How should I add the cotton candy topping?
Top the cake with cotton candy just before serving (and certainly before taking photos!), since it dissolves and wilts quickly. If you can’t find cake flour locally, here’s how to make a homemade version using all purpose flour and cornstarch, but the rules Print
Whimsical Cotton Candy Cake
This whimsical Cotton Candy Cake features ultra-soft, pastel-tinted layers infused with irresistible cotton candy flavor, all enveloped in a dreamy cotton candy buttercream and finished with a cloud of real cotton candy on top. Perfect for celebrations or anyone who loves nostalgic, fun desserts, this cake is as delightful to eat as it is to behold.
- Prep Time: 45 minutes
- Cook Time: 35 minutes
- Total Time: 1 hour 20 minutes
- Yield: 15 slices
- Category: Desserts
- Method: Baking
- Cuisine: American
- Diet: Vegetarian
Ingredients
Cotton Candy Cake
- 2 1/2 cups (265g) sifted cake flour*
- 2 tsp baking powder
- 1/2 tsp baking soda
- 1/2 tsp salt
- 1 1/2 cups (300g) granulated sugar
- 1/2 cup (113g) unsalted butter, room temperature
- 4 large egg whites, room temperature
- 1/2 cup (120ml) vegetable oil
- 1 Tbsp Amoretti Natural Cotton Candy Artisan Flavor
- 1 1/4 cups (300ml) full-fat buttermilk**, room temperature
- 1 drop blue food coloring (optional)
- 1 drop pink food coloring (optional)
Cotton Candy Buttercream
- 2 cups (452g) unsalted butter, room temperature
- 7 cups (840g) powdered sugar
- 1 tsp Amoretti Natural Cotton Candy Artisan Flavor
- 4 Tbsp whole milk, room temperature
- 1/4 tsp salt
- 1 small drop blue food color gel
- 1 small drop purple food color gel
Topping
- 1 cup cotton candy
*DIY Cake Flour Recipe:
- For each cup of cake flour needed, measure 1 cup all-purpose flour, remove 2 Tbsp, and replace with 2 Tbsp cornstarch. Sift well.
**DIY Buttermilk Recipe:
- Add 1 Tbsp white vinegar to a measuring jar and top with 1 1/4 cups whole milk. Stir and let sit for 15 minutes.
Instructions
- Prepare the Cake Pans: Preheat your oven to 350°F/177°C. Spray three 6-inch or two 8-inch cake pans with baking spray and line the bottoms with parchment circles.
- Mix Dry Ingredients: In a medium bowl, whisk together cake flour, baking powder, baking soda, and salt. Set aside.
- Cream Butter and Sugar: In the bowl of a stand mixer fitted with the paddle attachment, beat the butter on high speed until creamy (about 2 minutes). Add granulated sugar and beat at medium-high for another 2 minutes, until light and fluffy, scraping down the bowl as needed.
- Add Egg Whites and Liquids: With the mixer on low, add egg whites one at a time until just combined. Scrape down as needed. Add the vegetable oil and Amoretti Natural Cotton Candy Artisan Flavor, increase speed to high, and beat for 1 minute.
- Combine Wet and Dry Ingredients: Turn mixer off, add all the dry ingredients. Mix on low until barely combined, then slowly pour in the buttermilk and continue mixing for about 30 seconds until the batter is smooth and a bit thin.
- Color the Batter: Divide the batter evenly into 2 bowls. Tint one bowl with 1 drop of pink food gel, whisk until color is uniform. Tint the other bowl with 1 small drop of blue food gel and whisk. (Note: Blue may turn slightly purple due to the pink base.)
- Layer Cake Batter: Using two separate 1/2 cup measures, alternate scooping pink and blue batter in random patterns into each prepared pan, until all batter is distributed.
- Bake: Bake cakes for 28 to 32 minutes, or until a toothpick inserted in the center comes out clean or with a few moist crumbs. Cool in pans for 5 minutes, then turn out onto a wire rack to cool completely.
- Make the Buttercream: With a stand mixer or hand mixer, cream butter on medium-high for about 7 minutes, until very pale and light. Gradually add powdered sugar on low, scraping after each addition. Add the milk and salt and mix on low until smooth and fluffy. Reserve 1 cup of buttercream for coloring later if desired. Add the Amoretti Natural Cotton Candy Artisan Flavor to the remaining buttercream and mix on low until pink and fully incorporated.
- Assemble the Cake: Once cakes are cool and level, add a swipe of buttercream on a cake board, lay the first layer, and top with 3/4 cup buttercream, smoothing to about 1/2 inch thick. Continue stacking, filling, and crumb coating with buttercream. Refrigerate for at least 30 minutes to firm up.
- Decorate (Watercolor Finish, Optional): Divide reserved white buttercream if using into two bowls. Tint one with purple, one with blue food gel. Use these and the pink buttercream to create a watercolor effect on the cake. Chill for 20 minutes.
- Pipe Decoration and Add Cotton Candy: Fill a piping bag with the remaining buttercream and pipe swirls around the top edge. Just before serving or displaying, top generously with cotton candy. (Note: Cotton candy topping should be added last, as it will droop after about an hour.)
Notes
- DIY Cake Flour: For every cup of flour, remove 2 Tbsp and add 2 Tbsp cornstarch. Sift well.
- DIY Buttermilk: Add 1 Tbsp white vinegar to a measuring jar and fill to 1 1/4 cups with whole milk. Stir and let sit 15 minutes.
- Cake layers can be made in advance and kept wrapped at room temperature for 2 days or frozen up to 2 months.
- Buttercream can be stored in the fridge in an airtight container for up to 2 weeks. Bring to room temperature and re-whip before using.
- Top with cotton candy only just before serving; it will deflate after an hour.
- Batter colors are essential for the pastel effect since most color will bake off during cooking.
Nutrition
- Serving Size: 1 slice (1/15 of the cake)
- Calories: 580
- Sugar: 64g
- Sodium: 190mg
- Fat: 27g
- Saturated Fat: 14g
- Unsaturated Fat: 12g
- Trans Fat: 0g
- Carbohydrates: 81g
- Fiber: 0.5g
- Protein: 3g
- Cholesterol: 50mg

