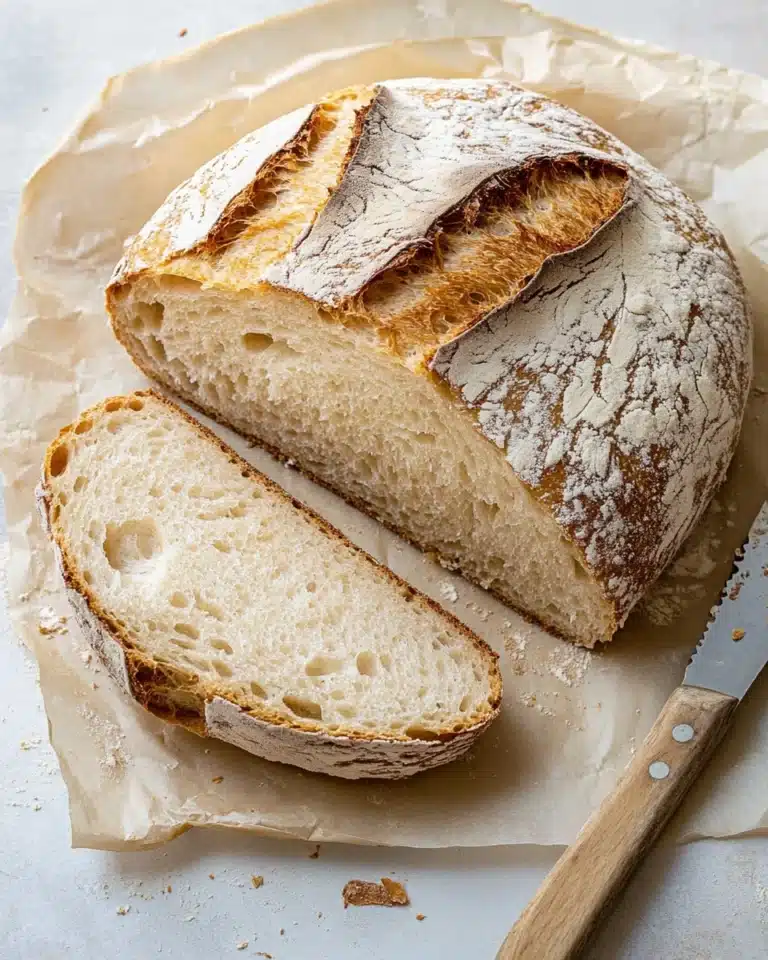
If you have ever dreamed of baking bread that boasts an irresistibly crisp crust and a tender, airy crumb without spending hours kneading, then the Dutch Oven No Knead Crusty Bread Recipe is an absolute game changer. This recipe is pure magic in the kitchen, combining simplicity with artisanal results. Using just a handful of basic ingredients and your trusty Dutch oven, you can create a loaf that fills your home with the cozy aroma of fresh-baked bread and delights every bite. Whether you’re a seasoned baker or a curious beginner, this recipe promises an easy, satisfying journey to bread perfection that will quickly become a favorite in your repertoire.
Ingredients You’ll Need

One of the best parts about the Dutch Oven No Knead Crusty Bread Recipe is how straightforward the ingredient list is. Each component plays a crucial role, whether a foundational base, a flavor enhancer, or creating that perfect texture.
- Warm water (1 1/2 cups): This activates the yeast and helps to form the dough with just the right consistency.
- Yeast (1 packet or 2.25 teaspoons): The active dry, instant, or quick rise yeast is your bread’s secret to that beautiful rise and airy crumb.
- Fine grain salt (1 ½ teaspoons): Salt not only seasons the bread but also controls yeast activity to develop flavor.
- All-purpose flour (3 1/4 cups): The essential structure builder, this flour creates the chewy crumb and crust that’s incredibly satisfying.
How to Make Dutch Oven No Knead Crusty Bread Recipe
Step 1: Mix the Water, Yeast, and Salt
Begin by combining the warm water, yeast, and salt in a large bowl. Using a whisk helps the yeast and salt dissolve evenly—this sets the stage for an even rise and balanced flavor. The warmth of the water is key here to wake up the yeast without killing it.
Step 2: Add the Flour
This step is wonderfully simple—dump all the flour into the bowl at once and stir until a sticky dough forms. Don’t sweat the messiness; the dough is supposed to be tacky and loose at this point. If your dough feels too wet or dry, adjust by adding a sprinkle more flour or water, aiming for a shaggy, uniform texture.
Step 3: Allow the Dough to Rise
Cover the bowl with a towel or place a loosely fitting lid on your container, then leave it in a warm spot for 2 to 3 hours. During this time, the yeast powers up and the dough will double in size, becoming wonderfully puffy and aerated. I love using a trick of briefly warming my oven and then turning it off to provide a cozy environment—perfect if your kitchen is on the cooler side.
Step 4: Preheat the Dutch Oven
About 30 minutes before baking, crank your oven up to 450 degrees F with the Dutch oven (lid on) inside. Preheating the Dutch oven thoroughly ensures it gets scorching hot, which is crucial for developing that famous crispy crust.
Step 5: Shape the Loaf on Parchment Paper
Flour a piece of parchment paper, then scrape your dough onto it. Fold the edges up to form a rough loaf shape. Don’t worry about it looking perfect—rustic charm is the point! Then flip the loaf with the parchment so the flour-dusted side is on top and position it so it fits nicely in your Dutch oven.
Step 6: Score and Bake the Bread
Optionally, use a sharp knife or razor blade to cut a few shallow slits across the top; this allows the bread to expand while baking. Carefully remove the hot Dutch oven from the oven, take off the lid, and slide the parchment paper with the dough into it. Cover it back up and bake for 35 minutes (40 if the dough was chilled). Then uncover and bake for another 5–10 minutes until the loaf turns into a golden brown masterpiece.
Step 7: Cool Before Slicing
Once baked, gently transfer the bread on the parchment to a cooling rack or cutting board. Resist the urge to slice immediately; allowing it to rest at least 10 minutes (or ideally longer) helps the crumb set properly and enhances the flavor and texture.
How to Serve Dutch Oven No Knead Crusty Bread Recipe

Garnishes
A fresh loaf of Dutch Oven No Knead Crusty Bread is delightful on its own, but enhancing it with a smear of good-quality butter or a drizzle of olive oil and sea salt can take it to the next level. You might also sprinkle herbs like rosemary or thyme on the butter for an herbal twist that complements the bread’s savory notes.
Side Dishes
This bread pairs perfectly with a variety of dishes—from hearty soups and stews to fresh garden salads. Imagine dipping a crusty slice into a warm bowl of tomato basil soup or enjoying it alongside a rich beef stew. Its robust crust and tender interior make it an ideal companion for soaking up all kinds of sauces.
Creative Ways to Present
Turn this loaf into a star centerpiece by hollowing it out and using it as an edible bread bowl for dips or chili. Alternatively, slice it thick for rustic sandwiches loaded with your favorite fillings, or grill slices with garlic butter for a savory treat that’s perfect at any meal. The possibilities with your Dutch Oven No Knead Crusty Bread Recipe are endless!
Make Ahead and Storage
Storing Leftovers
If you find yourself with leftover bread (though that’s a rare occasion!), wrapping it tightly in plastic wrap or storing it in a paper bag inside an airtight container will preserve its freshness for a couple of days. Avoid refrigeration, as this tends to dry bread out quickly.
Freezing
This bread freezes beautifully. Slice it before freezing for convenience, then wrap the slices tightly in freezer-safe bags or foil. When you want a slice, you can toast it straight from the freezer for a fresh-baked taste in minutes.
Reheating
To breathe life back into your stored bread, the oven is your best friend. Preheat to 350 degrees F, then warm the whole loaf or slices for 10-15 minutes wrapped in foil. This revives the crust’s crispness and softens the crumb wonderfully, almost like it was freshly baked again.
FAQs
Can I use whole wheat flour instead of all-purpose?
Yes, you can substitute whole wheat flour, but keep in mind the bread will be denser and have a nuttier flavor. You may want to experiment by replacing only part of the all-purpose flour to maintain some lightness.
Why doesn’t this recipe require kneading?
The long, slow rise allows the gluten to develop naturally without the need for kneading, making this bread less labor-intensive with the same great texture.
Do I really need a Dutch oven for this recipe?
Using a Dutch oven is highly recommended because it traps steam released by the dough, creating that signature crisp crust. If you don’t have one, try using a heavy pot with a lid or bake on a baking stone with a pan of water for steam.
What if my kitchen is cold for rising?
To encourage the dough to rise, place the covered bowl in a warm spot like inside your slightly warm oven or near a radiator. Patience is key, and the dough may just take a little longer.
Can I add herbs or other flavorings to the dough?
Absolutely! Mix in herbs like rosemary or thyme, or even olives and roasted garlic for a flavorful twist. Just fold them in after adding the flour so they’re evenly distributed.
Final Thoughts
There is something truly special about baking your own bread at home, and the Dutch Oven No Knead Crusty Bread Recipe makes it so enjoyable and approachable. With minimal effort and a handful of simple ingredients, you create an aromatic, crusty loaf that looks and tastes like it came from a bakery. I wholeheartedly encourage you to try this recipe for yourself – fresh bread will never feel out of reach again, and you might just find yourself hooked on the magic of no-knead baking!
PrintDutch Oven No Knead Crusty Bread Recipe

A simple and foolproof Dutch Oven No Knead Crusty Bread recipe that yields a beautifully crusty loaf with minimal effort. This rustic bread requires no kneading, uses just a few basic ingredients, and is baked inside a hot Dutch oven to develop a perfect crust and soft airy interior.
- Prep Time: 10 minutes
- Cook Time: 45 minutes
- Total Time: 2 hours 55 minutes
- Yield: 8 servings
- Category: Bread
- Method: Baking
- Cuisine: American
Ingredients
Ingredients
- 1 1/2 cups warm water (about 100°F)
- 1 packet active dry yeast (or instant/quick rise, 2.25 teaspoons)
- 1 1/2 teaspoons fine grain salt
- 3 1/4 cups all-purpose flour
Instructions
- Mix the water, yeast, and salt: In a large bowl or container, whisk together the warm water, yeast, and salt until they are fully or almost fully dissolved to activate the yeast.
- Add the flour: Add all the all-purpose flour at once and stir until a sticky dough forms. It will be messy and sticky, but ensure everything is uniformly wet. Adjust with small amounts of flour or water if needed.
- Allow to rise in a warm place: Cover the bowl with a kitchen towel or loosely with a lid and let the dough rise in a warm area for 2–3 hours until it has doubled in volume.
- Bake or refrigerate: After rising, you can either proceed to bake the dough or store it in the refrigerator for later baking (see notes for storage tips).
- Preheat the Dutch oven: About 30–60 minutes before baking, preheat your oven to 450°F and place your Dutch oven with the lid on inside to heat thoroughly.
- Flour parchment paper and add dough: Dust a piece of parchment paper with flour. Scrape the dough onto the paper and shape it gently into a loaf by folding the edges over using a spatula.
- Shape the loaf: Use the parchment edges to flip the loaf so the floured side is on top and the loaf is centered on the paper. Shape into an oval or round according to your Dutch oven shape.
- Score the loaf: Optional but recommended: use a sharp knife or razor blade to cut about 1/2 inch deep slits across the top of the loaf for better expansion and an attractive crust pattern.
- Place loaf in hot Dutch oven carefully: Remove the preheated Dutch oven from the oven and carefully lift the parchment paper to place the dough inside, removing the lid.
- Bake: Cover and bake for 35 minutes at 450°F (40 minutes if dough was refrigerated). After that, remove the lid and bake for an additional 5–10 minutes until the crust turns golden brown and crisp.
- Cool before slicing: Remove the bread using the parchment paper onto a wire rack or cutting board and allow it to cool for at least 10 minutes, preferably 30 minutes to an hour before slicing to set the crumb.
Notes
- You can store the dough in the refrigerator after the first rise for up to 24 hours and bake it straight from cold, adding a few extra minutes to the baking time.
- If your kitchen is cold, create a warm proofing environment by warming your oven briefly, turning it off, then placing the bowl inside to rise.
- Be patient during the rise time; the dough should roughly double in size for best results.
- If the dough seems too wet or too dry initially, adjust with small increments of flour or water to reach the right sticky consistency.